Use Zoom’s Immersive View
Prerequisites
According to the company, you need Zoom’s desktop client running version 5.6.3 or higher on Windows or macOS to use this feature. In addition, the macOS version should be High Sierra or newer. If you don’t have Zoom yet, you can download it from the company’s download portal.
How to Enable Immersive View
With the requirements out of the way, let’s get to the steps for how to enable and use immersive view.
The Immersive view is enabled by default for all free and single Pro accounts. If you are an administrator, you can enable the feature from Account Management -> Account Settings -> Meeting (Advanced) -> Immersive View.
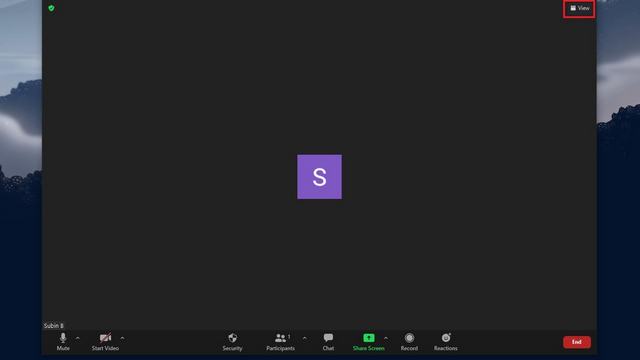
Meeting hosts can choose to enable the immersive view on Zoom. To use immersive view in a meeting, click on the ‘View’ button at the top-right corner.
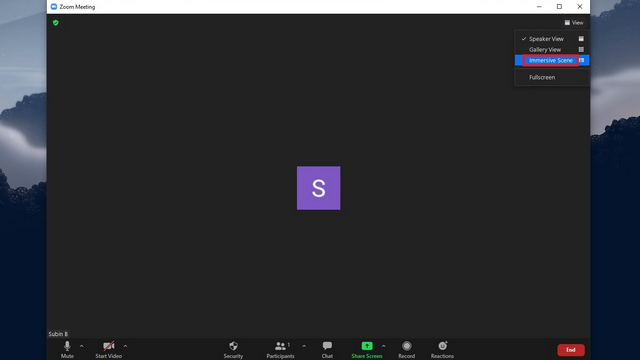
From the list of options that appear, click on Immersive Scene.
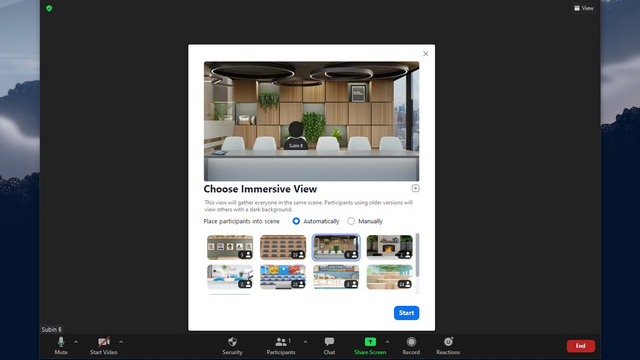
You can now choose to place participants manually or automatically into space. Hosts can drag and drop to rearrange participants. Choose one of those options based on your preference, pick the background, and click on Start.
There are 8 predefined scenes, including an art gallery, auditorium, boardroom, fireside chat, cafe, classroom, kitchen, and learning pods. Here are a few samples:
Use 25-Person Mode in Zoom Immersive View
So, that’s how you can use Zoom’s immersive view. In case you’re wondering, participants using older versions of Zoom will continue to see gallery or speaker views instead of a fancy classroom-like view. If you found this helpful, do not forget to check out our articles on using Zoom like a pro and the best Zoom tips and tricks to use the video conferencing platform to the fullest.


